Ledger Hardware Wallet
The Helium blockchain has support for Ledger hardware wallets. When installed on a Nano S or Nano X, the Helium ledger app allows you to:
- View your Helium address(es) and balances
- Issue payment to one address
- Submit Validator transactions, including stake, transfer, and unstake
This guide will walk through using Helium on a Ledger Nano S and is similar to the setup on a Ledger Nano X.
info
Ledger CLI using experimental mode is supported at this time. Work to enable HNT in Ledger Live in addition to a CLI is ongoing.
Installing the Helium ledger application
- Go to
Settings>Experimental featuresand toggleDeveloper modeto On
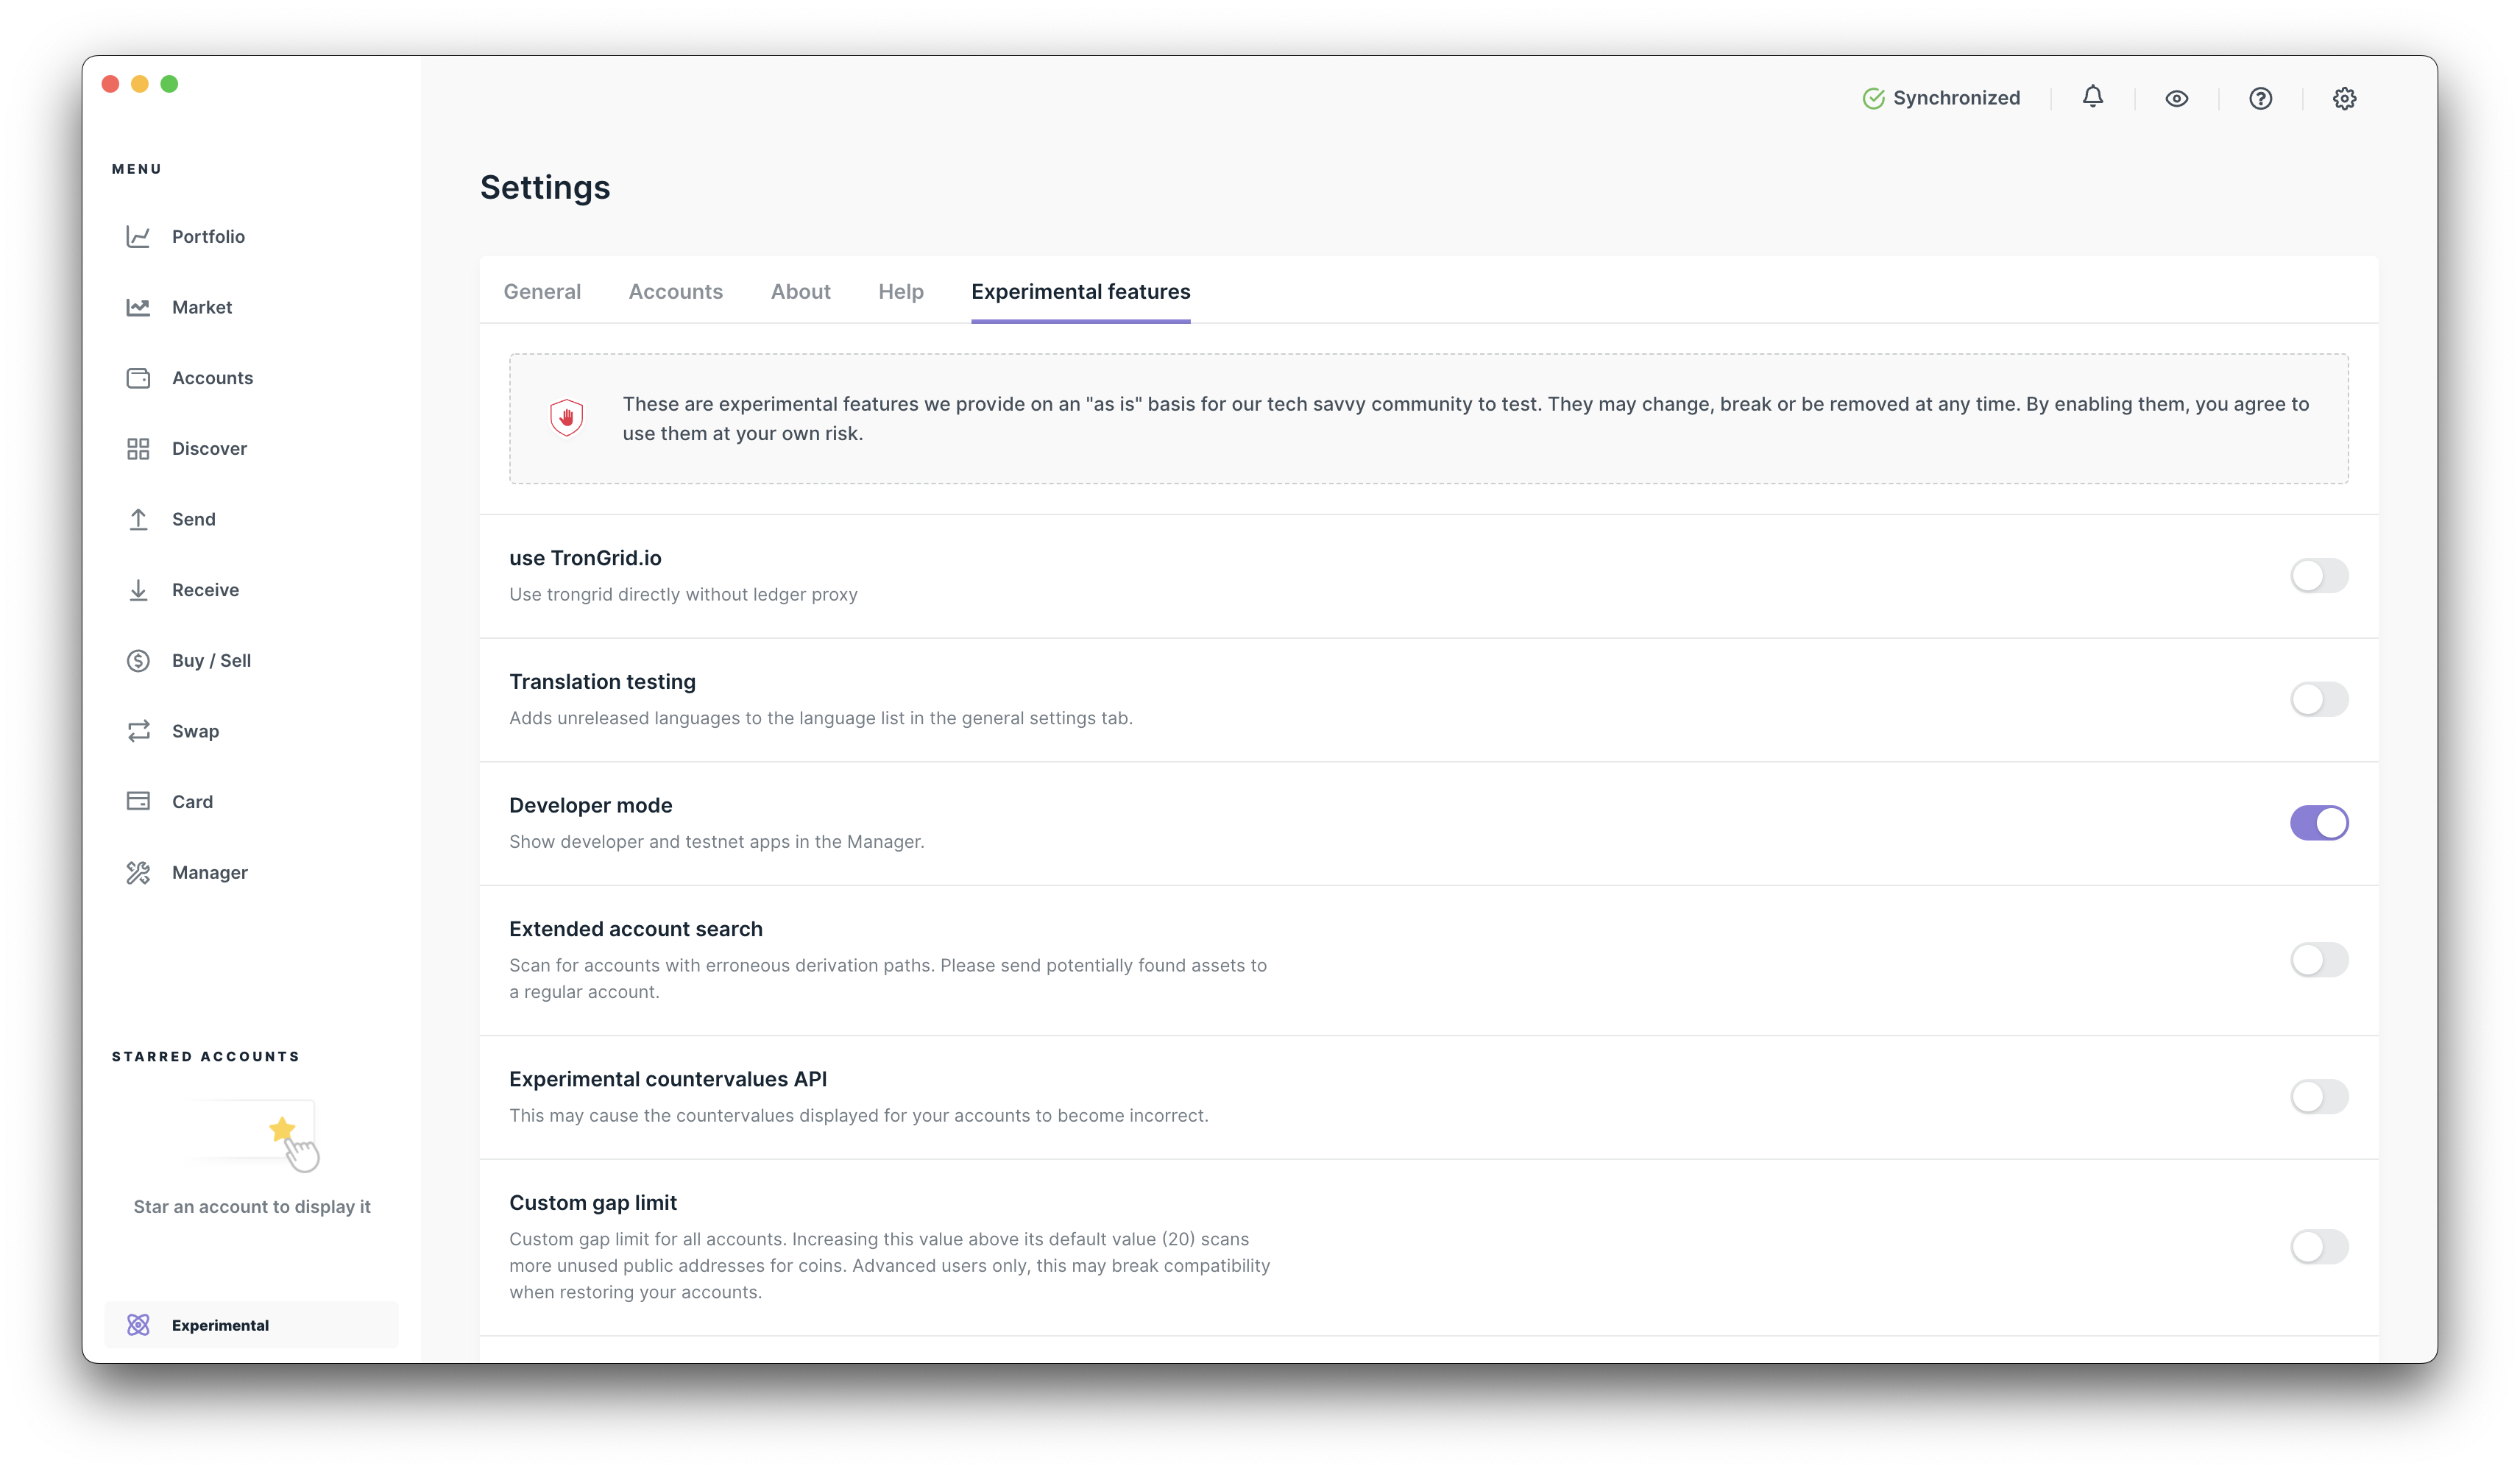
- Once enabled, go to
Managerand search "Helium".
info
If you can not find "Helium", you may need to update your Ledger Live.
Check your version of Ledger Live by going to Settings > About > Version.
- Click Install.
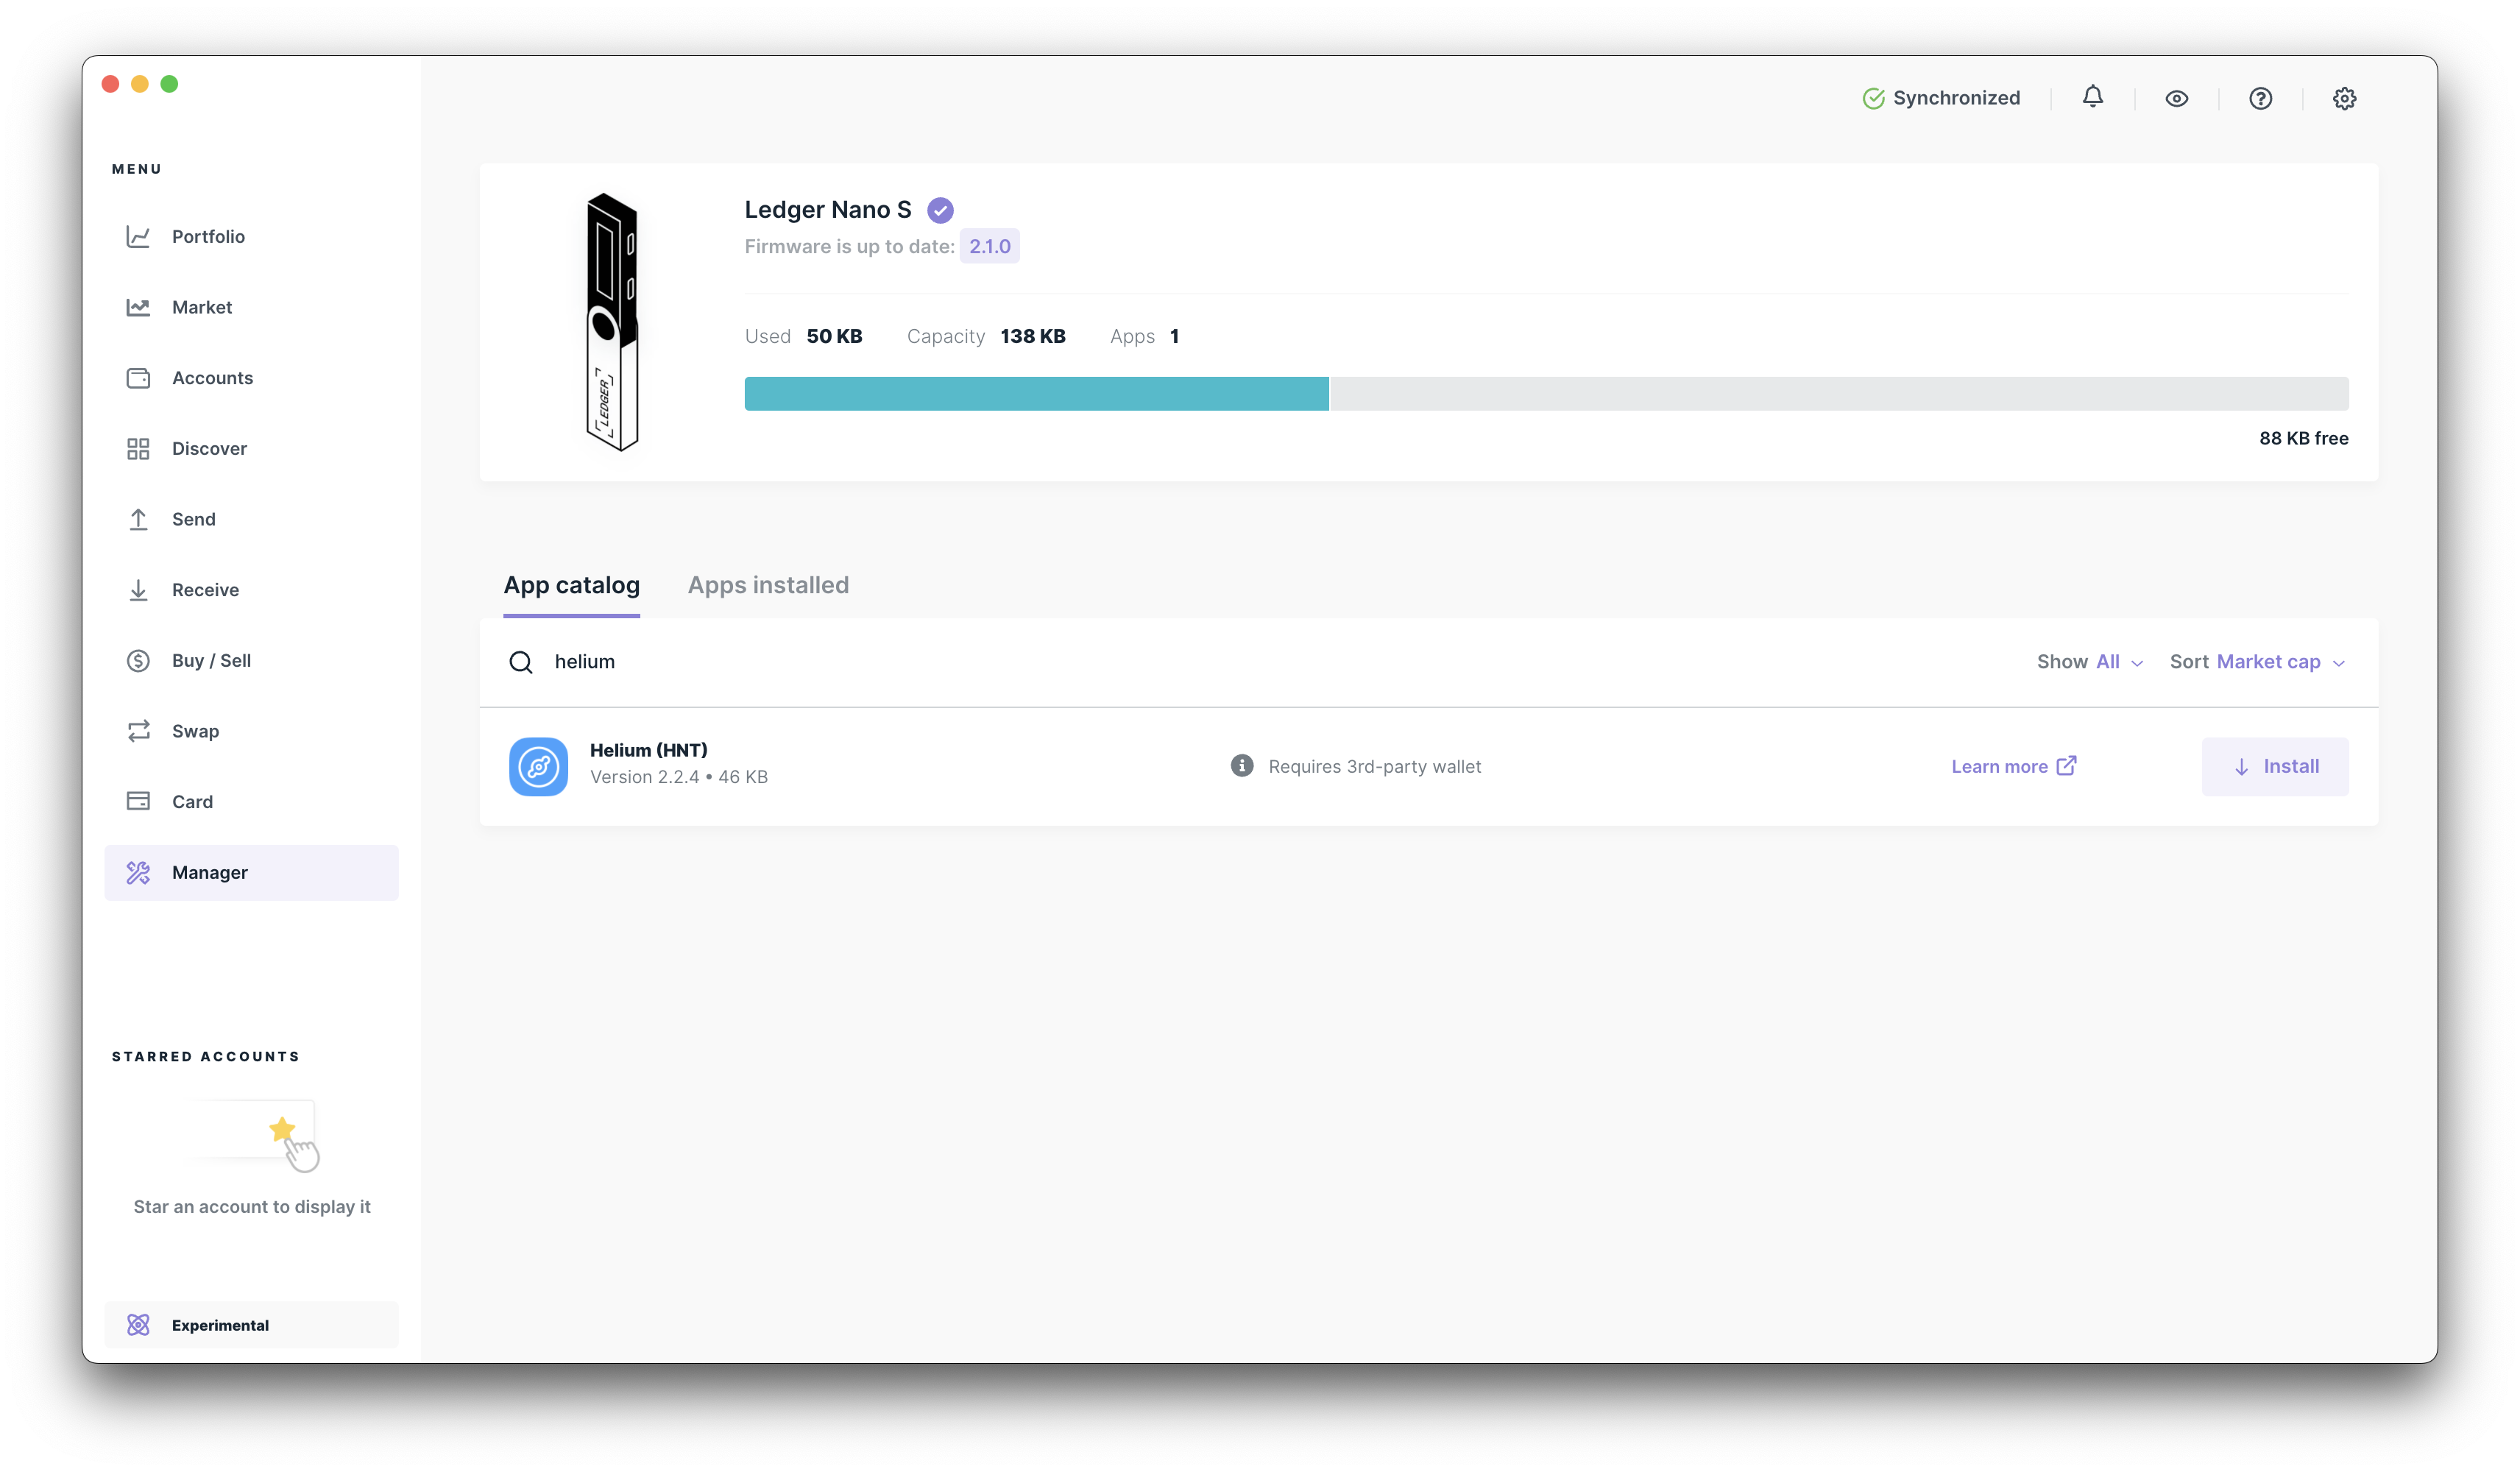
The Helium App has been signed by Ledger and is trusted. It is now installed on your Ledger device!
Start the Helium app by selecting it on the Ledger screen. The "Waiting for commands..." prompt should be on the screen.
Execute Commands
info
Make sure Ledger Live is closed before proceeding! The companion app cannot run when Ledger Live is blocking the USB device.
To interact with the app on Ledger, you will need to use the Helium Ledger CLI (CLI, for short). Head to Releases in the Github repo and download the most recent release for your operating system.
We'll use macOS for the remainder of this example.
- Download the release for macOS
helium-ledger-cli-v2.2.3-x86-64-macos.tar.gzand unzip the file - Navigate to where you downloaded the release on your computer in Terminal
- Make sure your Ledger is connected to your computer, then type
./helium-ledger-cli
~/helium-ledger-cli-v2.2.3-x86-64-macos$ ./helium-ledger-cli
Communicating with Ledger - follow prompts on screen
helium-ledger 2.2.3
Interact with Ledger Nano S for hardware wallet management

USAGE:
    helium-ledger-cli [OPTIONS] <SUBCOMMAND>

FLAGS:
    -h, --help       Prints help information
    -V, --version    Prints version information

OPTIONS:
        --account <account>      Select account index to stake from [default: 0]
        --emulator <emulator>    Enable interaction with emulator for development and testing by configuring port for
                                 TCP connection here (typically 9999 or 40000)

SUBCOMMANDS:
    balance       Get wallet information
    burn          Burn to given address
    help          Prints this message or the help of the given subcommand(s)
    pay           Pay a given address
    securities    Transfer Security Tokens
    validators    Stake a validator
Check Balance and Receive HNT
Type ./helium-ledger-cli balance to see your new Ledger address and balance.
~/helium-ledger-cli-v2.2.3-x86-64-macos$ ./helium-ledger-cli balance
Communicating with Ledger - follow prompts on screen
Ledger running Helium App v2.2.4

helium-ledger/2.2.3
+-----------------------------------------------------+-------------+--------------+-----------------+
| Address                                             | Balance HNT | Data Credits | Security Tokens |
+-----------------------------------------------------+-------------+--------------+-----------------+
| ACCOUNT_0_REDACTED                                  | 0.00000000  | 0            | 0.00000000      |
+-----------------------------------------------------+-------------+--------------+-----------------+
warning
Do not simply rely on what you see on the CLI, but verify it matches what is displayed on the Ledger.
info
You may add the --qr option to the command to display your address in the form of a QR code.
To receive HNT, simply provide your address in the base58 format output from the CLI or by using the QR code.
Multiple Wallet Support
Your Ledger hardware wallet can support many accounts per supported coin and this is no different
for HNT. To interact with a wallet other than the default 0th account, you place a --account N
flag before the command. So the balance command becomes:
helium-ledger-cli --account 1 balance
~/helium-ledger-cli-v2.0.0-x86-64-macos$ ./helium-ledger-cli --account 1 balance
Communicating with Ledger - follow prompts on screen
Ledger running Helium App v2.2.4

helium-ledger/2.2.3
+-----------------------------------------------------+-------------+--------------+-----------------+
| Address                                             | Balance HNT | Data Credits | Security Tokens |
+-----------------------------------------------------+-------------+--------------+-----------------+
| ACCOUNT_1_REDACTED                                  | 0.00000000  | 0            | 0.00000000      |
+-----------------------------------------------------+-------------+--------------+-----------------+
This --account N prefix applies to all commands. The balance command has a special flag, --scan
that you can place after the command. This allows you to scan all the wallets from 0 to N. For
example:
helium-ledger-cli --account 8 balance --scan
~/helium-ledger-cli-v2.0.0-x86-64-macos$ ./helium-ledger-cli --account 8 balance --scan
Communicating with Ledger - follow prompts on screen
Ledger running Helium App v2.2.4

helium-ledger/2.2.3
+-------+-----------------------------------------------------+-------------+--------------+-----------------+
| Index | Address                                             | Balance HNT | Data Credits | Security Tokens |
+-------+-----------------------------------------------------+-------------+--------------+-----------------+
| 0     | ACCOUNT_0_REDACTED                                  | 0.00000000  | 0            | 0.00000000      |
| 1     | ACCOUNT_1_REDACTED                                  | 0.00000000  | 0            | 0.00000000      |
| 2     | ACCOUNT_2_REDACTED                                  | 0.00000000  | 0            | 0.00000000      |
| 3     | ACCOUNT_3_REDACTED                                  | 0.00000000  | 0            | 0.00000000      |
| 4     | ACCOUNT_4_REDACTED                                  | 0.00000000  | 0            | 0.00000000      |
| 5     | ACCOUNT_5_REDACTED                                  | 0.00000000  | 0            | 0.00000000      |
| 6     | ACCOUNT_6_REDACTED                                  | 0.00000000  | 0            | 0.00000000      |
| 7     | ACCOUNT_7_REDACTED                                  | 0.00000000  | 0            | 0.00000000      |
+-------+-----------------------------------------------------+-------------+--------------+-----------------+
info
Up to 255 wallets may be used on the Ledger, but the --scan command fetches each address
one-by-one; it will take quite a long time to get all 255 addresses.
While this convenience feature exists, double-check the address using the screen of the Ledger
(ie: call the specific --account N balance without the --scan option) before sending any assets.
A nefarious CLI application could provide fake addresses.
Supported Transactions
We will document an example pay transaction here, but the documents may lag changes in the app.
It's good to get familiar with the built-in documentation of the CLI. At the top level, you can do
./helium-ledger-cli --help to get an understanding of what transactions might be available.
At the time of writing, you'll see the following "subcommands" are available:
- balance: get wallet information
- pay: pay a given address
- validator: stake a validator
To understand how to use a particular command, simply call the command with the addition of the
--help flag. For example:
./helium-ledger-cli --help
~/helium-ledger-cli-v2.0.0-x86-64-macos$ ./helium-ledger-cli pay --help
Communicating with Ledger - follow prompts on screen
helium-ledger-cli-pay 2.2.3
Pay a given address

USAGE:
    helium-ledger-cli pay [OPTIONS] <address> <amount>

FLAGS:
    -h, --help       Prints help information
    -V, --version    Prints version information

OPTIONS:
        --fee <fee>        Manually set the DC fee to pay for the transaction
        --memo <memo>      Memo field to include. Provide as a base64 encoded string [default: AAAAAAAAAAA=]
        --nonce <nonce>    Manually set the nonce for the transaction

ARGS:
    <address>    Address to send the tokens to
    <amount>     Amount of HNT to send
The USAGE example shows you what the command should look like and the ARGS are documented at the
bottom. Always refer to the built-in help menu over these docs.
Even if you rely on the --help menu from here on out, the pay command in this guide will be good
practice using the Ledger and make sure you understand the security model.
Sending HNT
- On the CLI, type
./helium-ledger-cli pay <address> <amount>to pay in HNT. Pressreturn. - On the Ledger, follow the prompts and confirm the transaction.
- The CLI should show a confirmation of the transaction.
$ ./helium-ledger-cli pay PAYEE_ACCOUNT 0.1
Communicating with Ledger - follow prompts on screen
Ledger running Helium App v2.2.3

Creating the following transaction:
+-----------------------------------------------------+----------------+-------+--------+
| Payee                                               | Pay Amount HNT | Nonce | DC Fee |
+-----------------------------------------------------+----------------+-------+--------+
| PAYEE_ACCOUNT                                       | 0.10000000     | 6     | 35000  |
+-----------------------------------------------------+----------------+-------+--------+
WARNING: do not use this output as the source of truth. Instead, rely on the Ledger Display
Use the screen of the Ledger to confirm everything you do.
The CLI app could be nefarious (maybe you downloaded the wrong one, maybe somebody change the program on your computer, etc). The Ledger on the other hand will only load applications signed by Ledger, so your security relies on you verifying the transaction details on the screen.
To be clear, do not compare the output to the output from the CLI shown above (the nefarious app might be showing you the fake address), but instead from your original source.
Verify the parameters of the transcation on the screen. Addresses are long and need to be scrolled (hold the right or left button only). Once you are satisfied with the field, click both buttons to confirm:
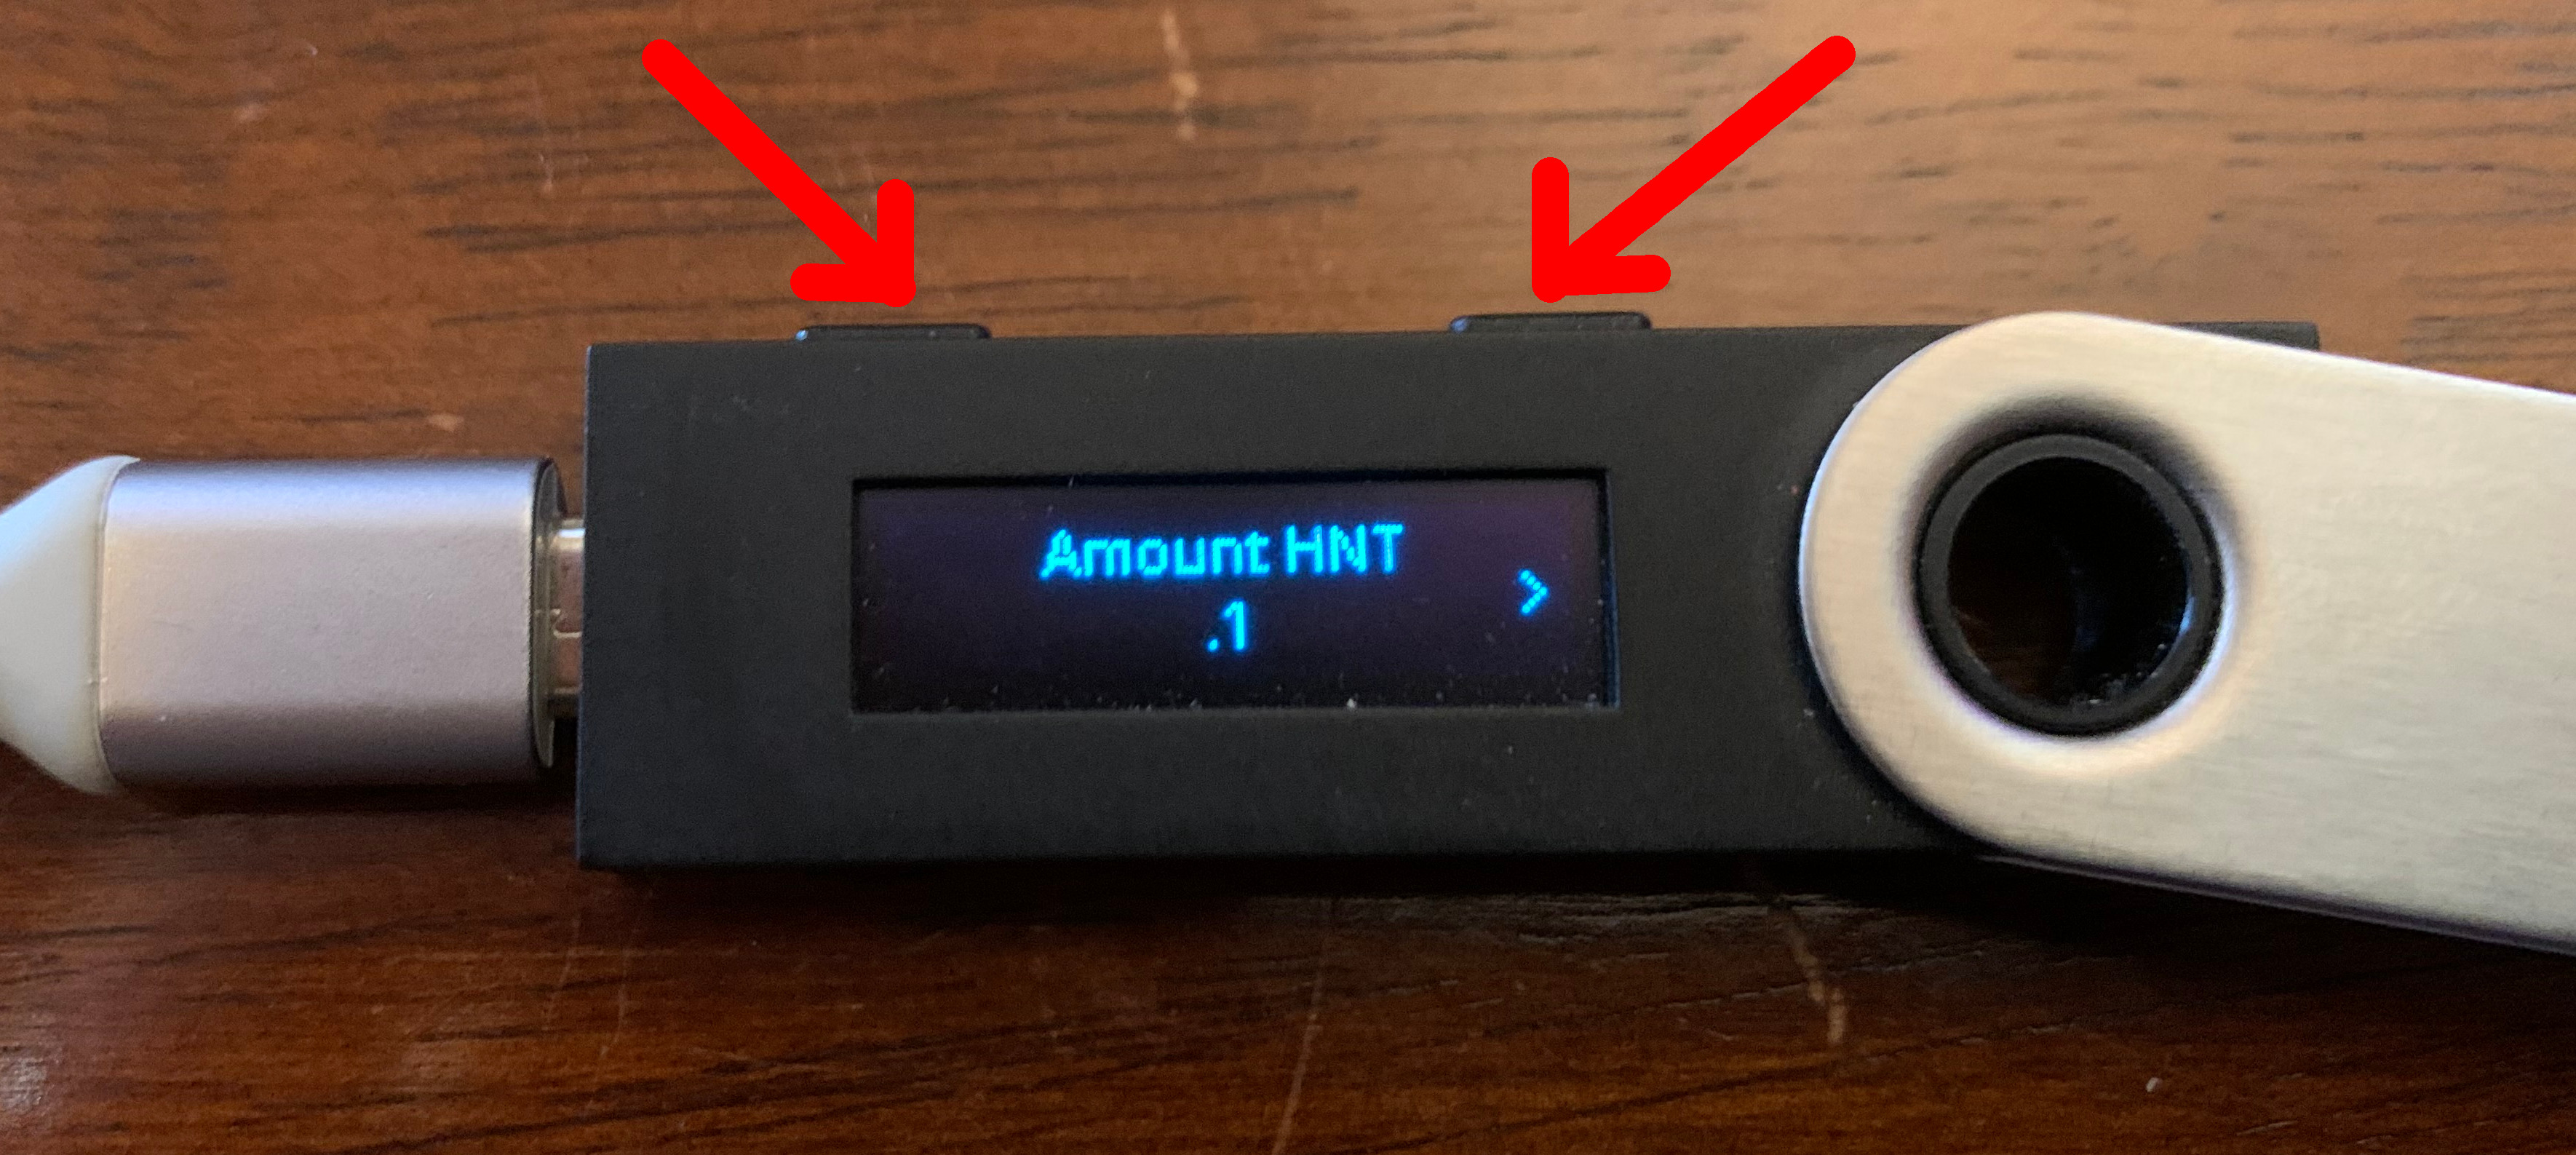
Once you click the "Sign Transaction?" confirmation, the transaction will be signed by the Ledger and submitted to the blockchain by the CLI application:
Successfully submitted transaction to API:
+---------+---------------------------------------------+
| Network | Hash                                        |
+---------+---------------------------------------------+
| mainnet | HASH                                        |
+---------+---------------------------------------------+
To check on transaction status, monitor the following URL:
     https://api.helium.io/v1/pending_transactions/HASH
Use the link displayed to check on your transaction status.
Common Issues
Can't download the zip file because it is untrusted.
- In the downloads bar of your browser, click the caret and select
Keep.

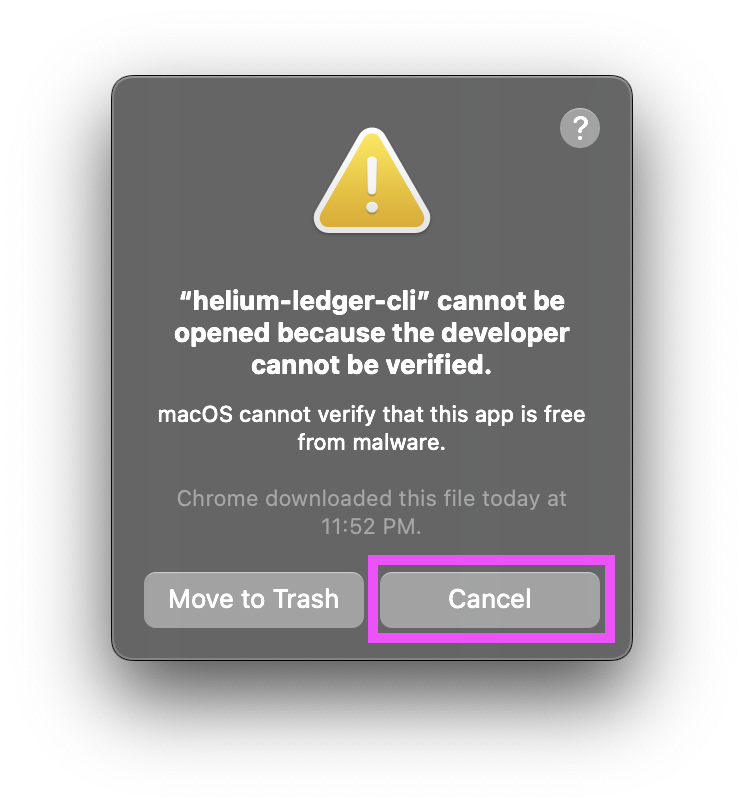
macOS "Developer cannot be verified" Error when running commands in Terminal
- Go to System Preferences > Security & Privacy
- Allow App downloaded from
App Store and Identified Developers - You may need to click the lock icon and give the CLI permissions
- Run the command in CLI again
Due to macOS security features, the first time you attempt to run the CLI you are likely to encounter this error:
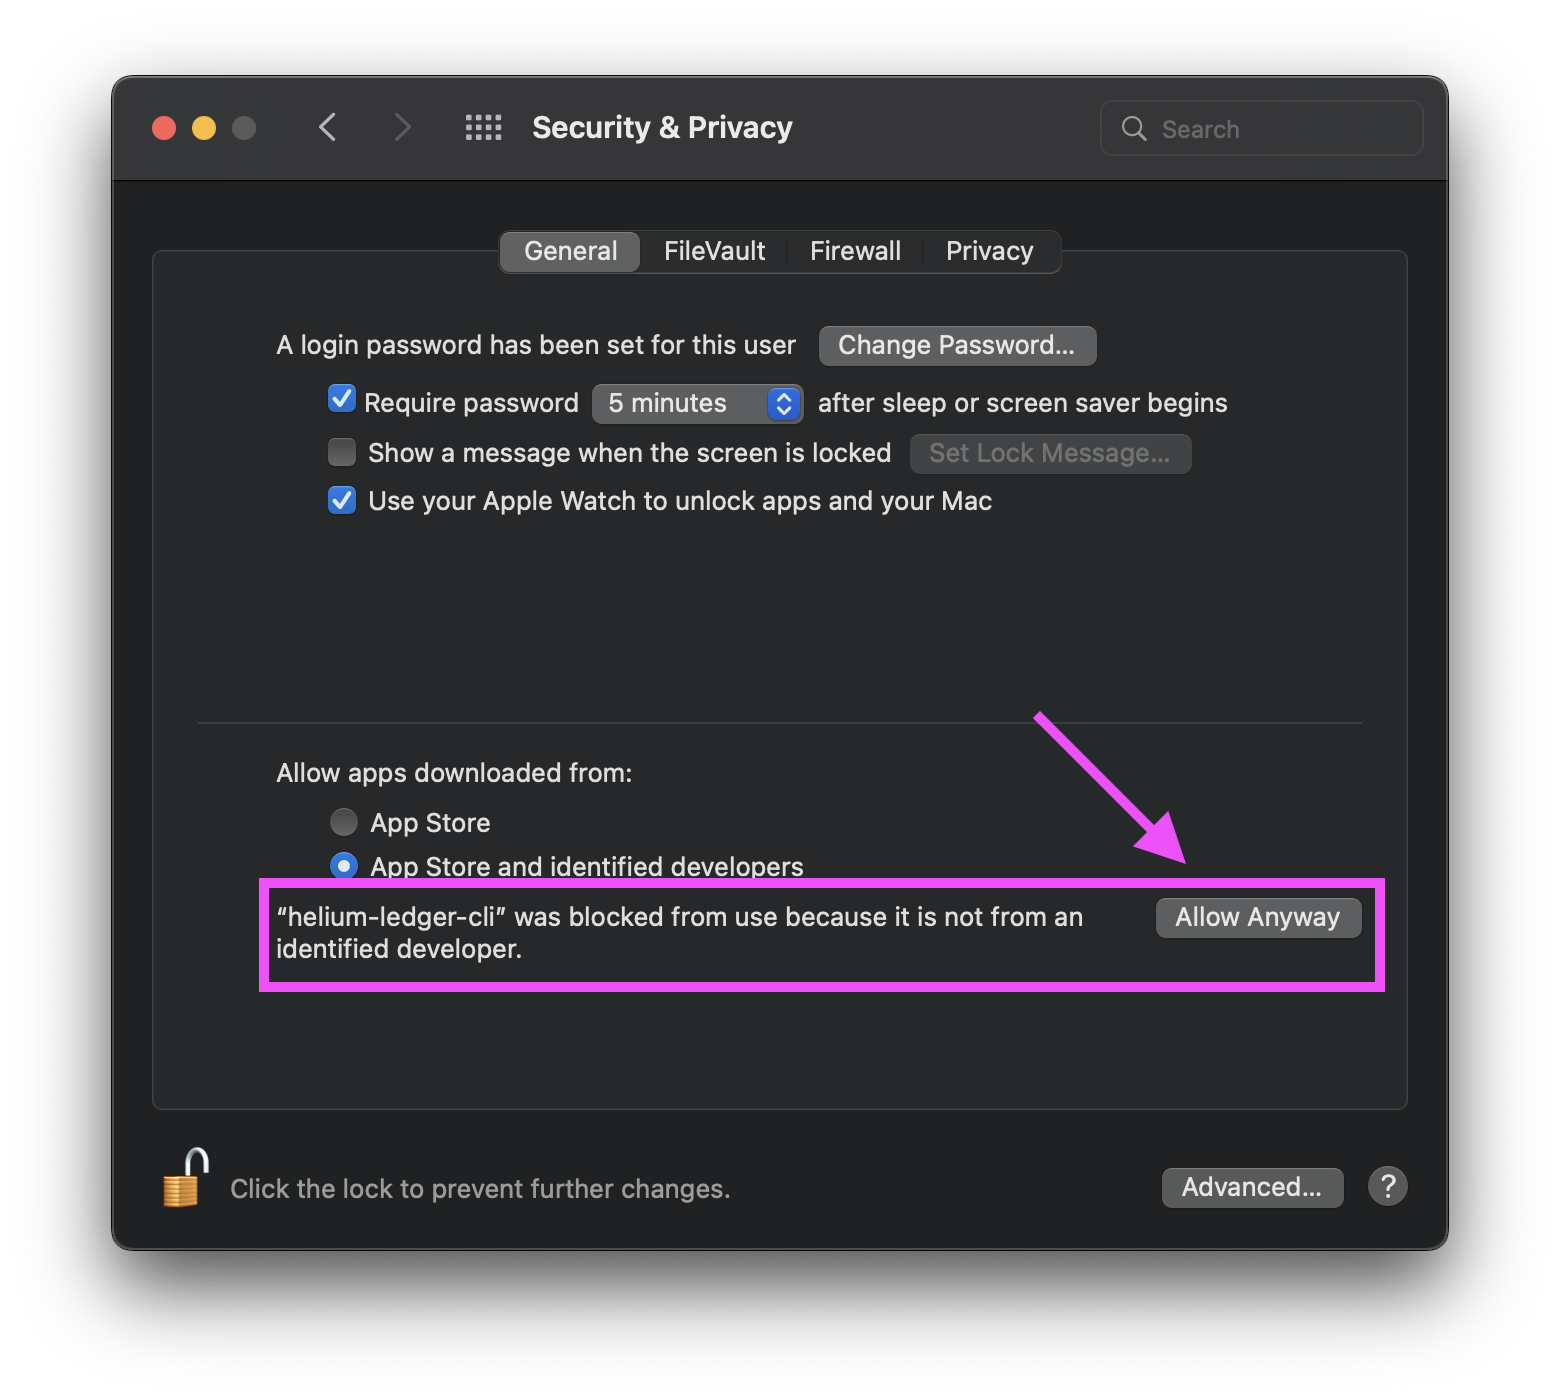
System Preferences > Security & Privacy Ensure that Allow App downloaded from App Store and Identified Developers is selected.
An Allow Anyway dialog should appear where indicated in the sample image. As a reminder, macOS is picky, and may not display this option right away, with the System Preferences window open, try to run the CLI from in Terminal again until this option is presented to you.
When it is, click Allow Anyway to continue.
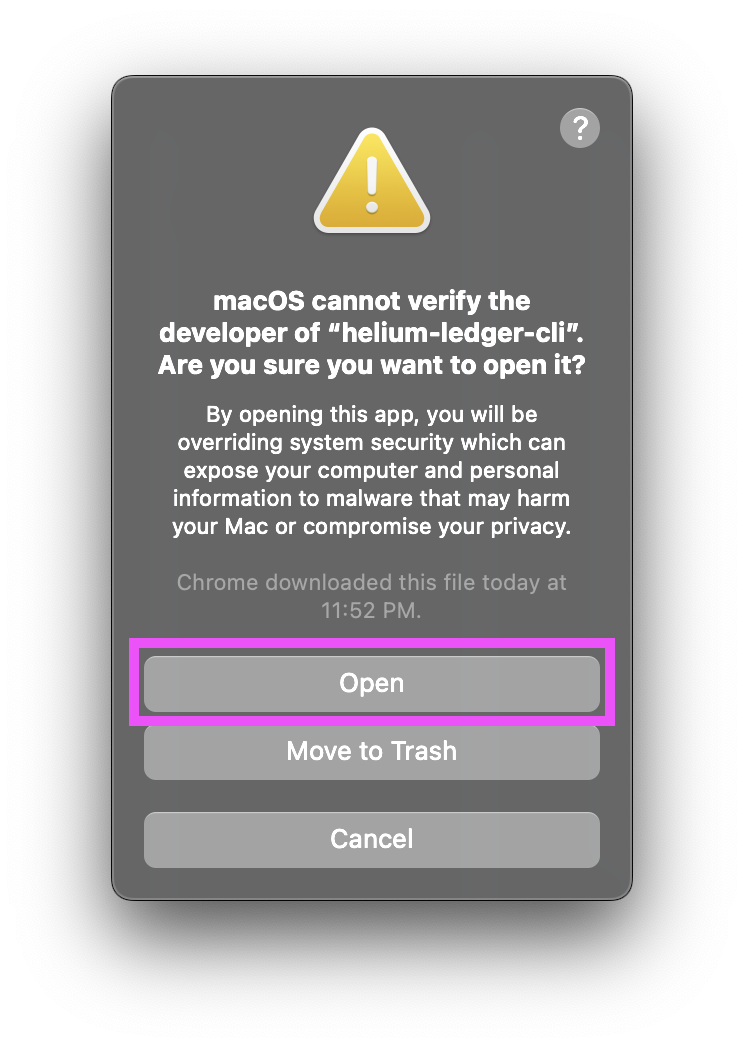
Run the CLI in Terminal again and you should now see a new pop up dialogue, click Open to continue using the CLI.
Failed opening hid device
If you see this error error: hid error: Failed opening hid device, close Ledger Live software and
run the command again in the CLI.
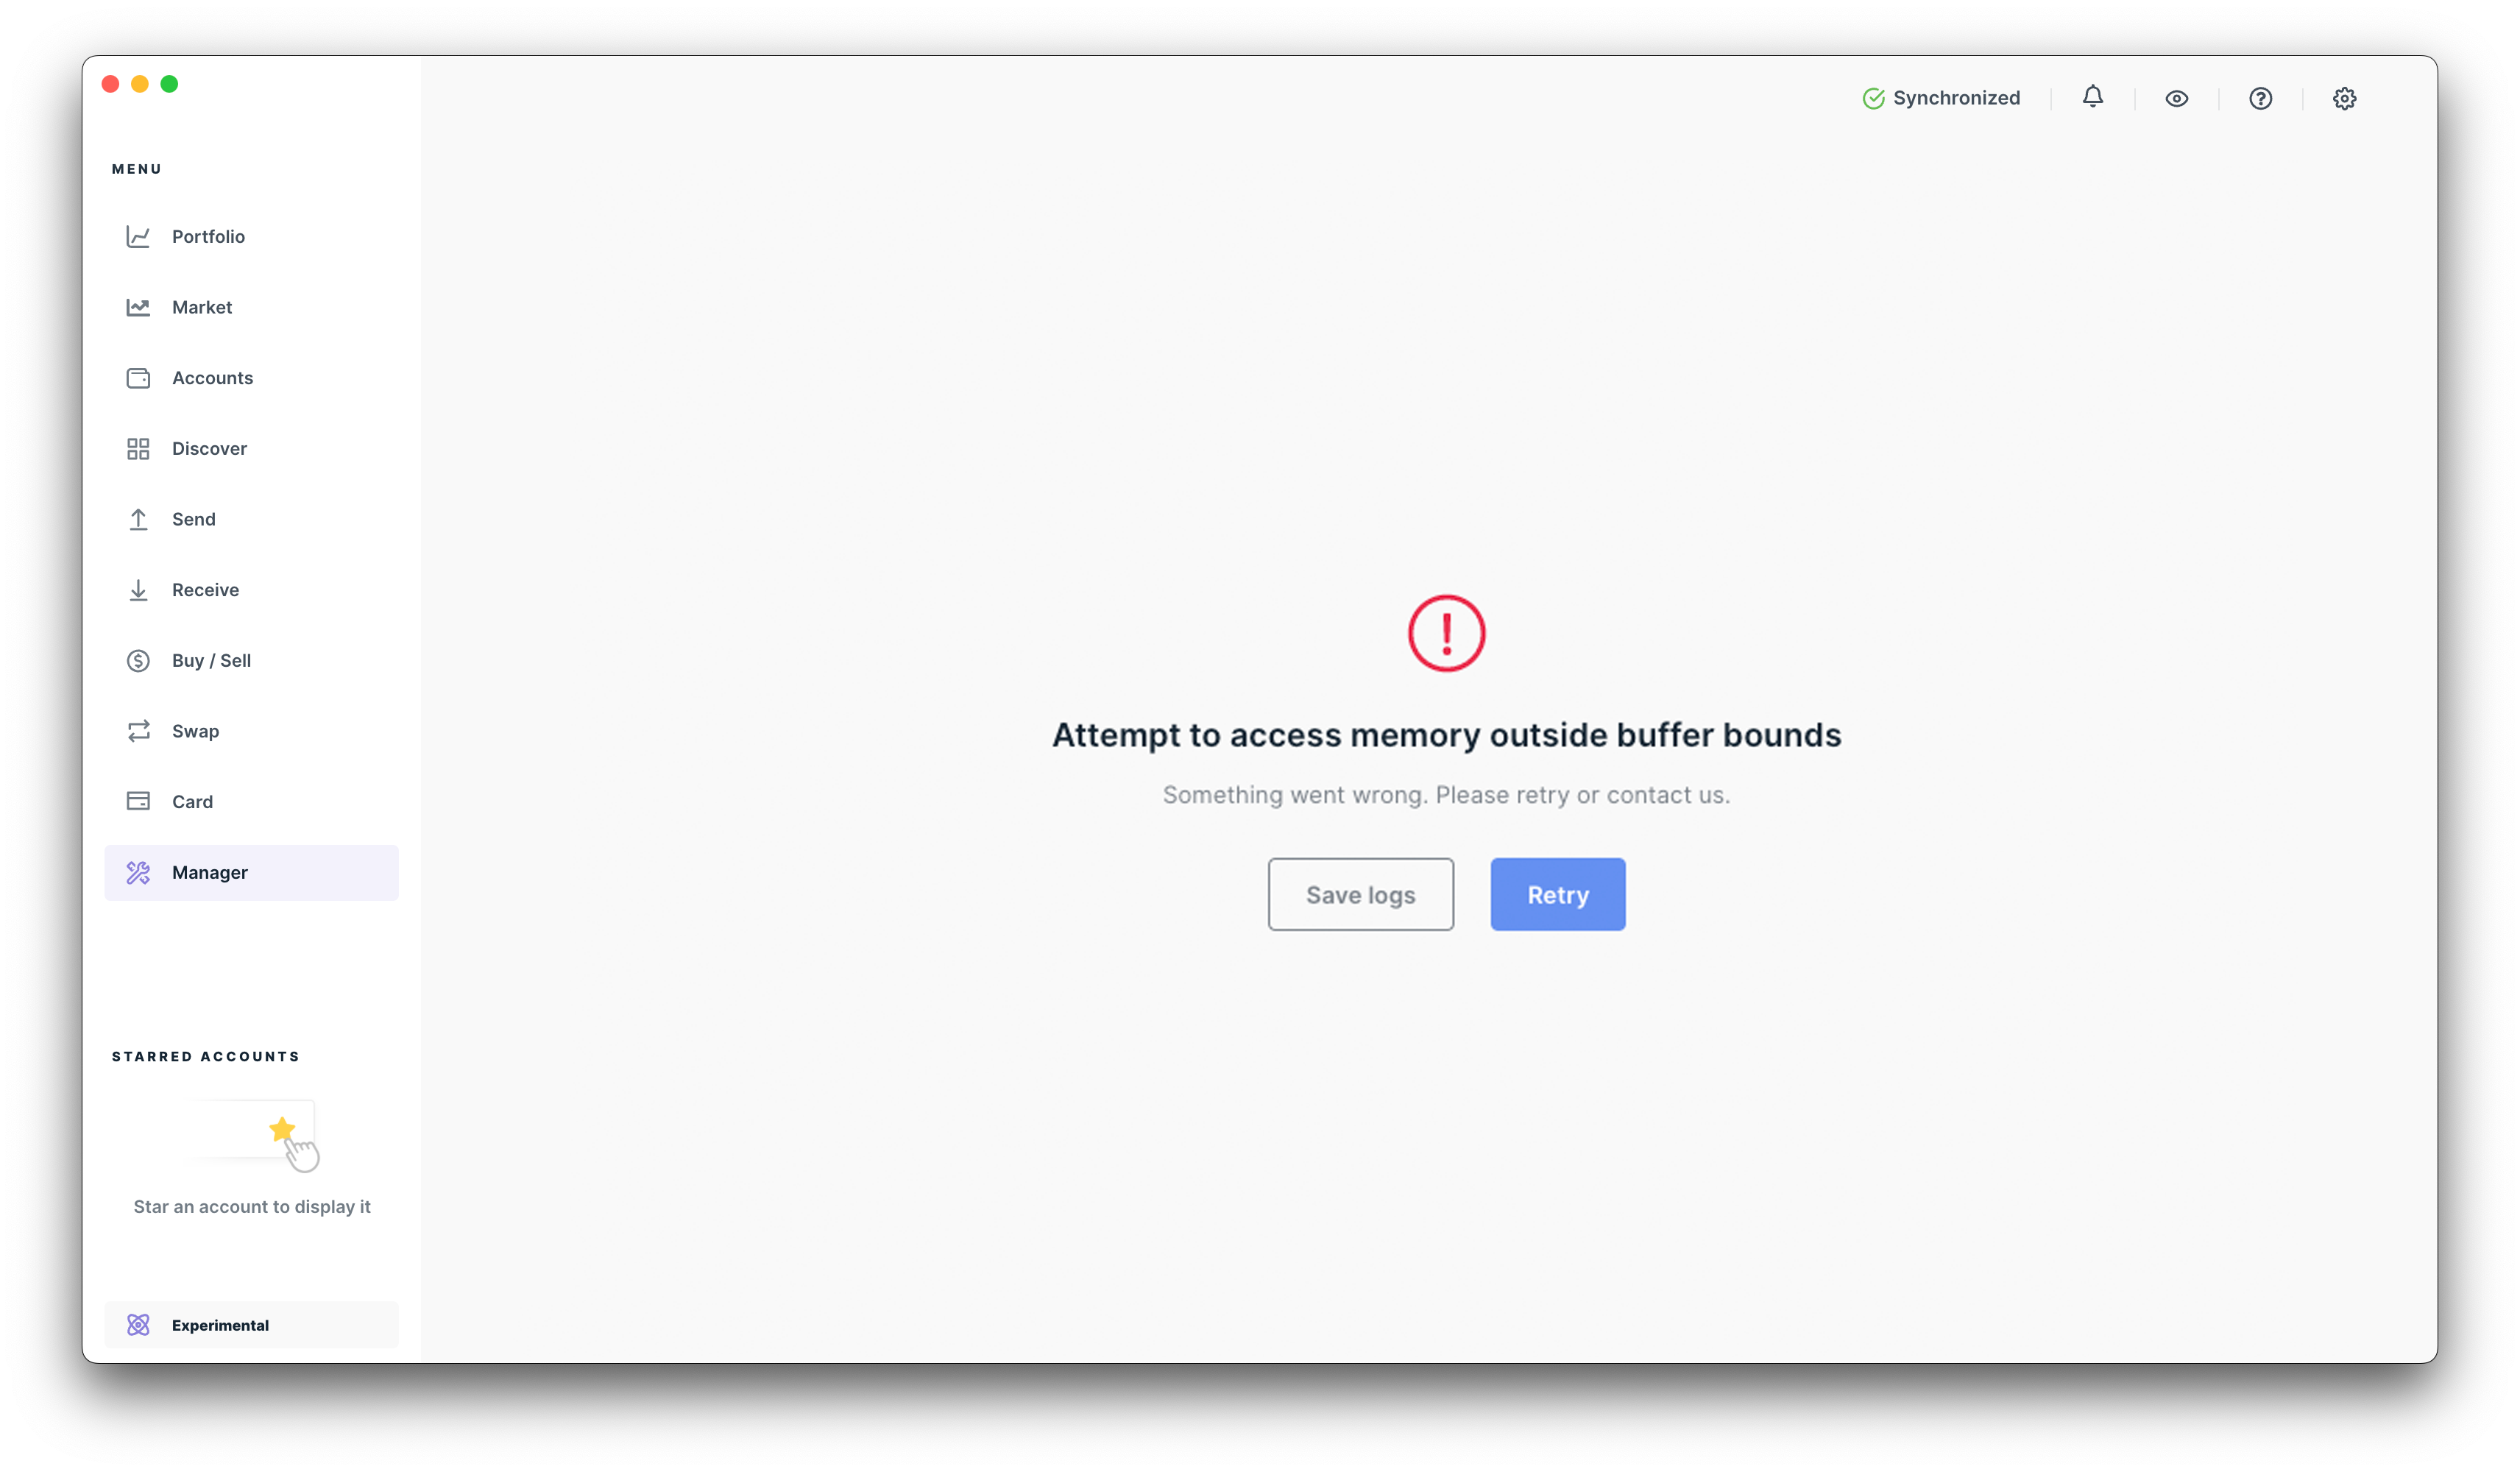
Unable to access memory outside buffer bounds
If on Ledger Live you see this error, unplug the ledger from your computer and plug it in again.
Security Model
The attack surface for using the Helium wallet app on a Ledger comprises the Helium app itself, the system firmware running on the Ledger Hardware Wallet, the computer that the Ledger Hardware Wallet is connected to, and possession/control of the device. For our purposes, the app only needs to ensure its correctness and protect the user from the computer that the Ledger Hardware Wallet is connected to. Other attack surfaces are beyond our control; we assume that the user physically controls the device, is not running malicious/buggy software on the device, and follows proper security protocols. The goal of the Helium app is to achieve security given these assumptions.
The main attack vector that we are concerned with, then, is a computer running malicious software.
This software may imitate programs like helium-ledger-cli in such a way that the user cannot tell
the difference, but secretly act maliciously. Specifically, the computer can do the following:
- Lie to the user about which actions it is performing.
Example: the user runs ./helium-ledger-cli balance to display their public key so that they may
receive payment, yet a hard-coded address is displayed
- Lie to the user about who the recipient is.
Example: the user runs ./helium-ledger-cli pay IntendedAddress amount, yet the program again uses
a hard-coded address
To combat these attacks, the app makes use of the embedded display on the Nano S. Data sent to/from the Ledger Hardware Wallet is displayed on the screen so the user can verify that the computer is not lying about what it sent or received. In the interest of user-friendliness, we would like to display as little information as possible, but each omission brings with it the risk of introducing a vulnerability. Therefore, the app displays all data by default, and omits data only after subjecting the omission to extreme scrutiny.