Replacing SD Card (Original Helium Hotspots)
Required Tools:
- Phillips Head or T8 bit screwdriver
- Strong fingernails, tweezers, or needle-nose pliers to remove the old SD card
- The ability to read/write a 64gb microSD card (unless pre-flashed card is acquired)
In the event that your microSD card fails, here are the steps to re-flash it or replace it with a brand new one:
- Unplug and remove the 4 screws from the bottom of the unit using a Phillips head screwdriver (Note that 1st gen Hotspots will need a T8 bit screwdriver, and also have a gps antenna wire attaching the top plastic to the board, this should stay connected.)
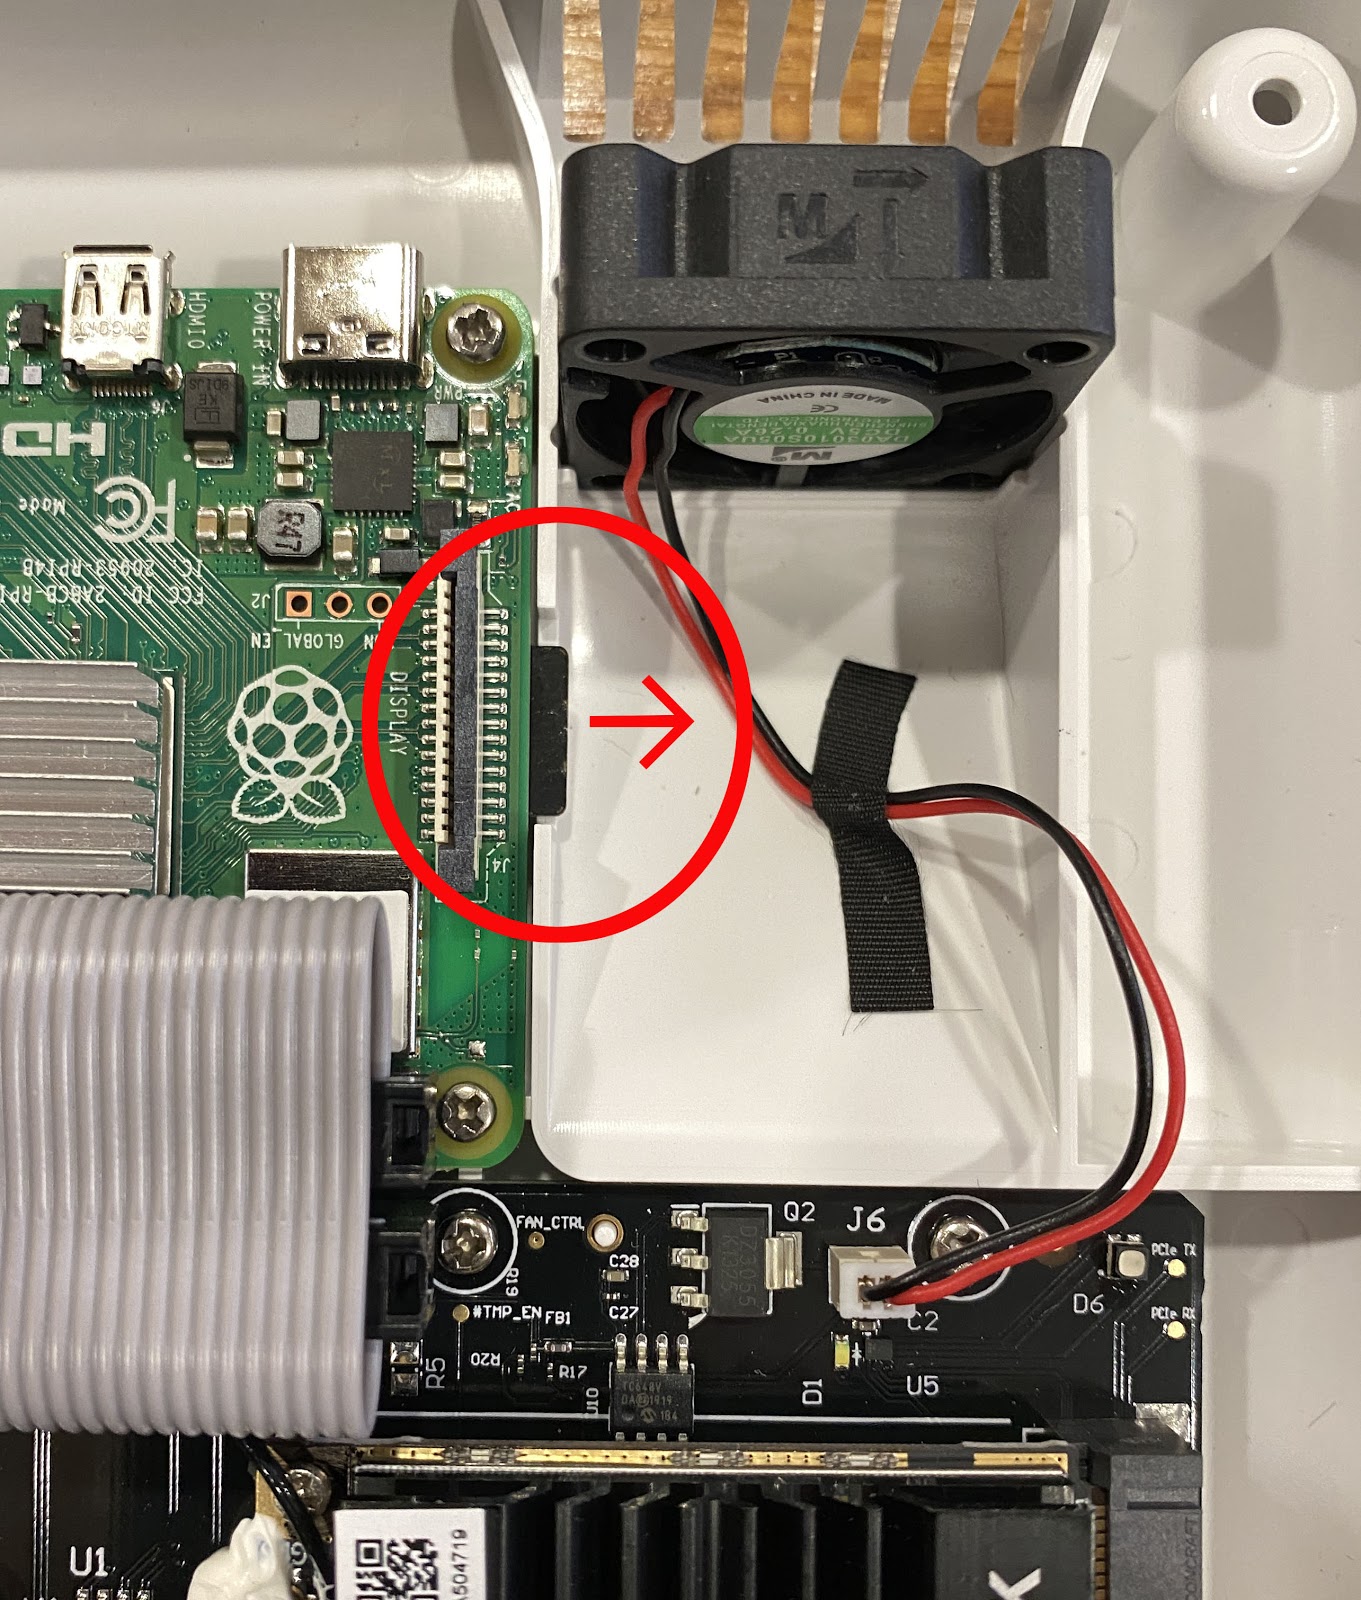
- Carefully remove the installed microSD card located by the fan - tweezers or needle-nose pliers
may help with this. (see image below)
- Format the new card or re-format the existing card into ExFat format.
- Download and install a program to Flash the card such as Etcher, if needed: https://www.balena.io/etcher
- Download the firmware image file to Flash. Note: Since 24 Jan 2022 the Firmware and Miner Images
are now separated, and can have different date releases Replace the
datepart of the following URL with the latest GA tagged >>FIRMWARE<< release in the Community Discord's #announcements channel.. i.e. new firmware date of2022.07.15.0andhttps://helium-nextgate.s3-us-west-2.amazonaws.com/artifacts/<date>-sdcard.img.gzbecomeshttps://helium-nextgate.s3-us-west-2.amazonaws.com/artifacts/2022.07.15.0-sdcard.img.gzand enter that URL in your browser. - Unzip the .gz file.
- Use Etcher to Flash the newly formatted microSD card with the file.
- Place the newly flashed card back into the card reader slot.
- Plug the Hotspot back and and confirm that it boots up.
- Screw the Hotspot back together.
info
This set of instructions are for Original Helium Hotspots. The instructions for RAK/MNTD Hotspots can be found here.
If you have purchased a pre-flashed card, the only steps you need are:
- Unplug and remove the 4 screws from the bottom of the unit using a Phillips head screwdriver (Note that 1st gen Hotspots will need a T8 bit screwdriver, and also have a gps antenna wire attaching the top plastic to the board, this should stay connected.)
- Carefully remove the installed microSD card located by the fan - tweezers or needle-nose pliers may help with this. (see image below)
- Place the pre-flashed card into the card reader slot.
- Plug the Hotspot back and and confirm that it boots up.
- Screw the Hotspot back together.
If successful, everything should boot up normally.
SD Card Sources
A 64GB SD card (or, even better, 128GB) like this would work, but any endurance type SD card comparable should suffice. Be careful to buy from a trusted vendor, as fake SD cards are often sold on the secondary market.
You can also buy pre-flashed SD cards from Parley Labs 64GB or PPL 128GB.