HTTP
Add an HTTP Integration
To add a Integration, go to Integrations on the left-hand menu. Select the integration to add - in this case, the HTTP integration.
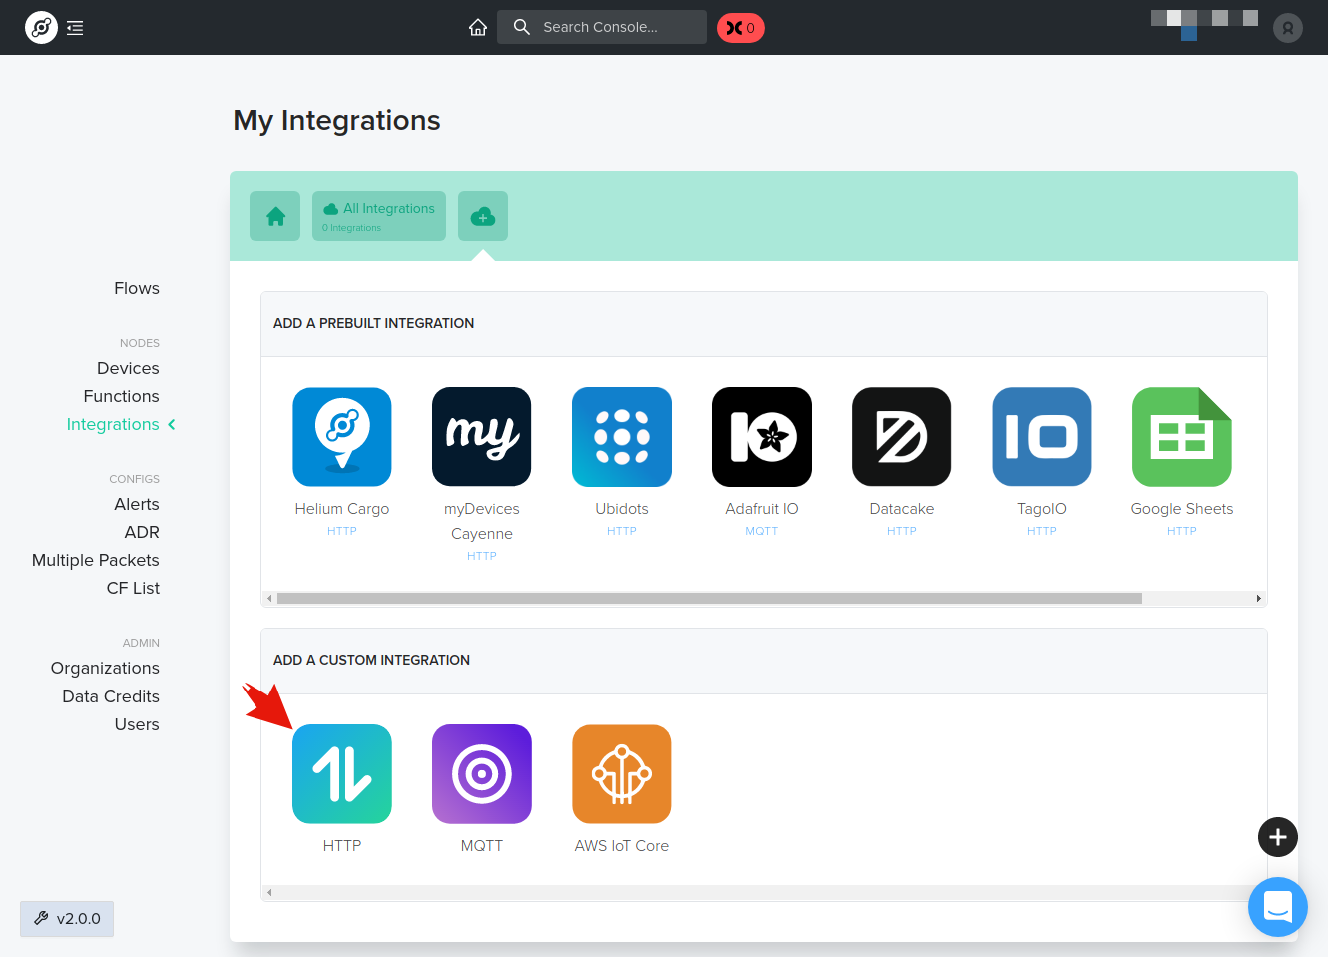
The next step is to paste the HTTP endpoint.
If you're still testing, you can find popular sites that can create HTTP endpoints for you and inspect packets. Requestbin and Beeceptor provide tools to make an HTTP endpoint quickly and easily.
Uplink (Receive Data from Device)
Uplink refers to your device sending data to be received by the network. With regards to the HTTP integration, this will be the device data that is sent to your HTTP endpoint of choice.
RequestBin Example
Create an endpoint by going to requestbin.com and click Create a Request Bin. Once created, copy the endpoint.
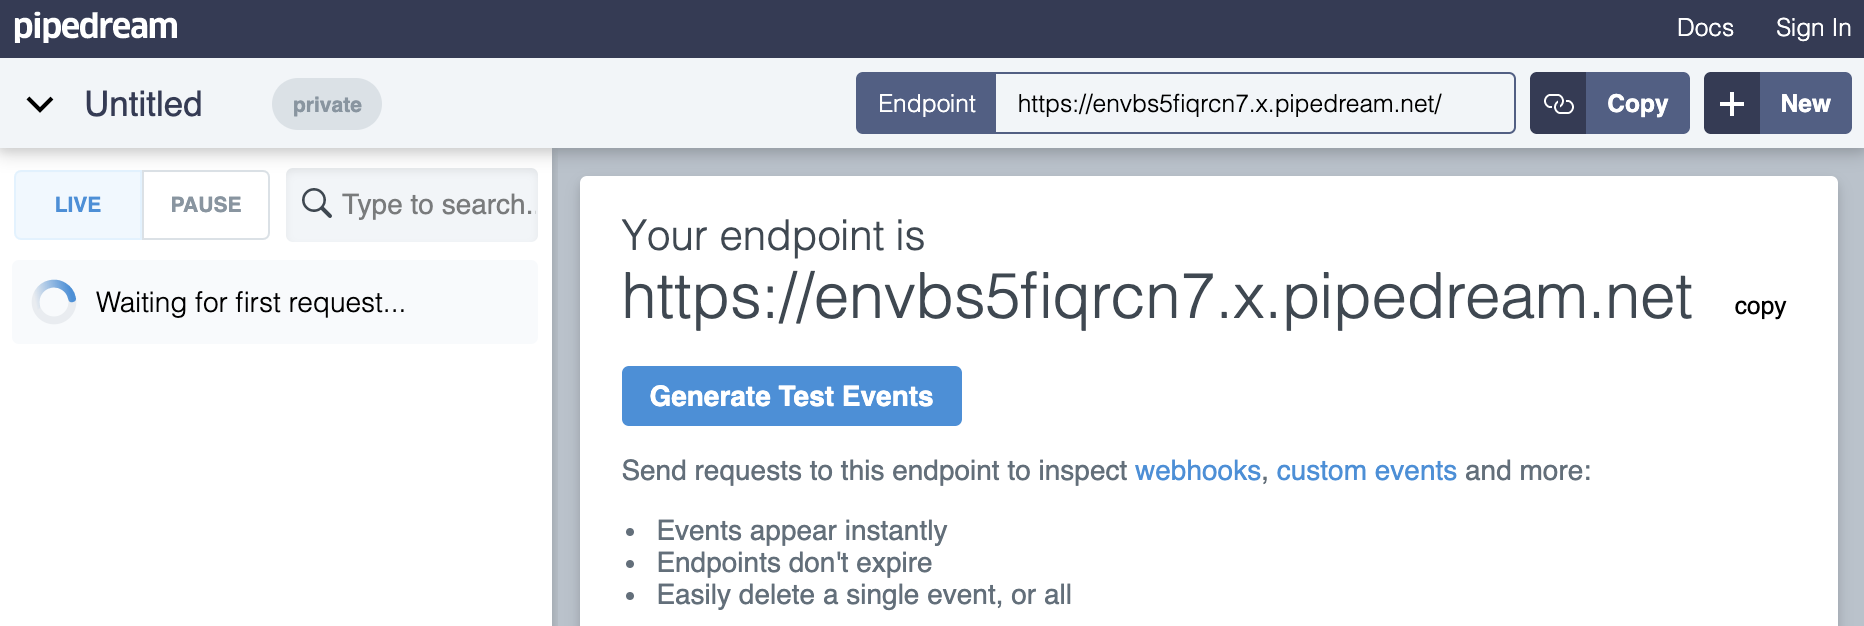
... and paste it in Console.
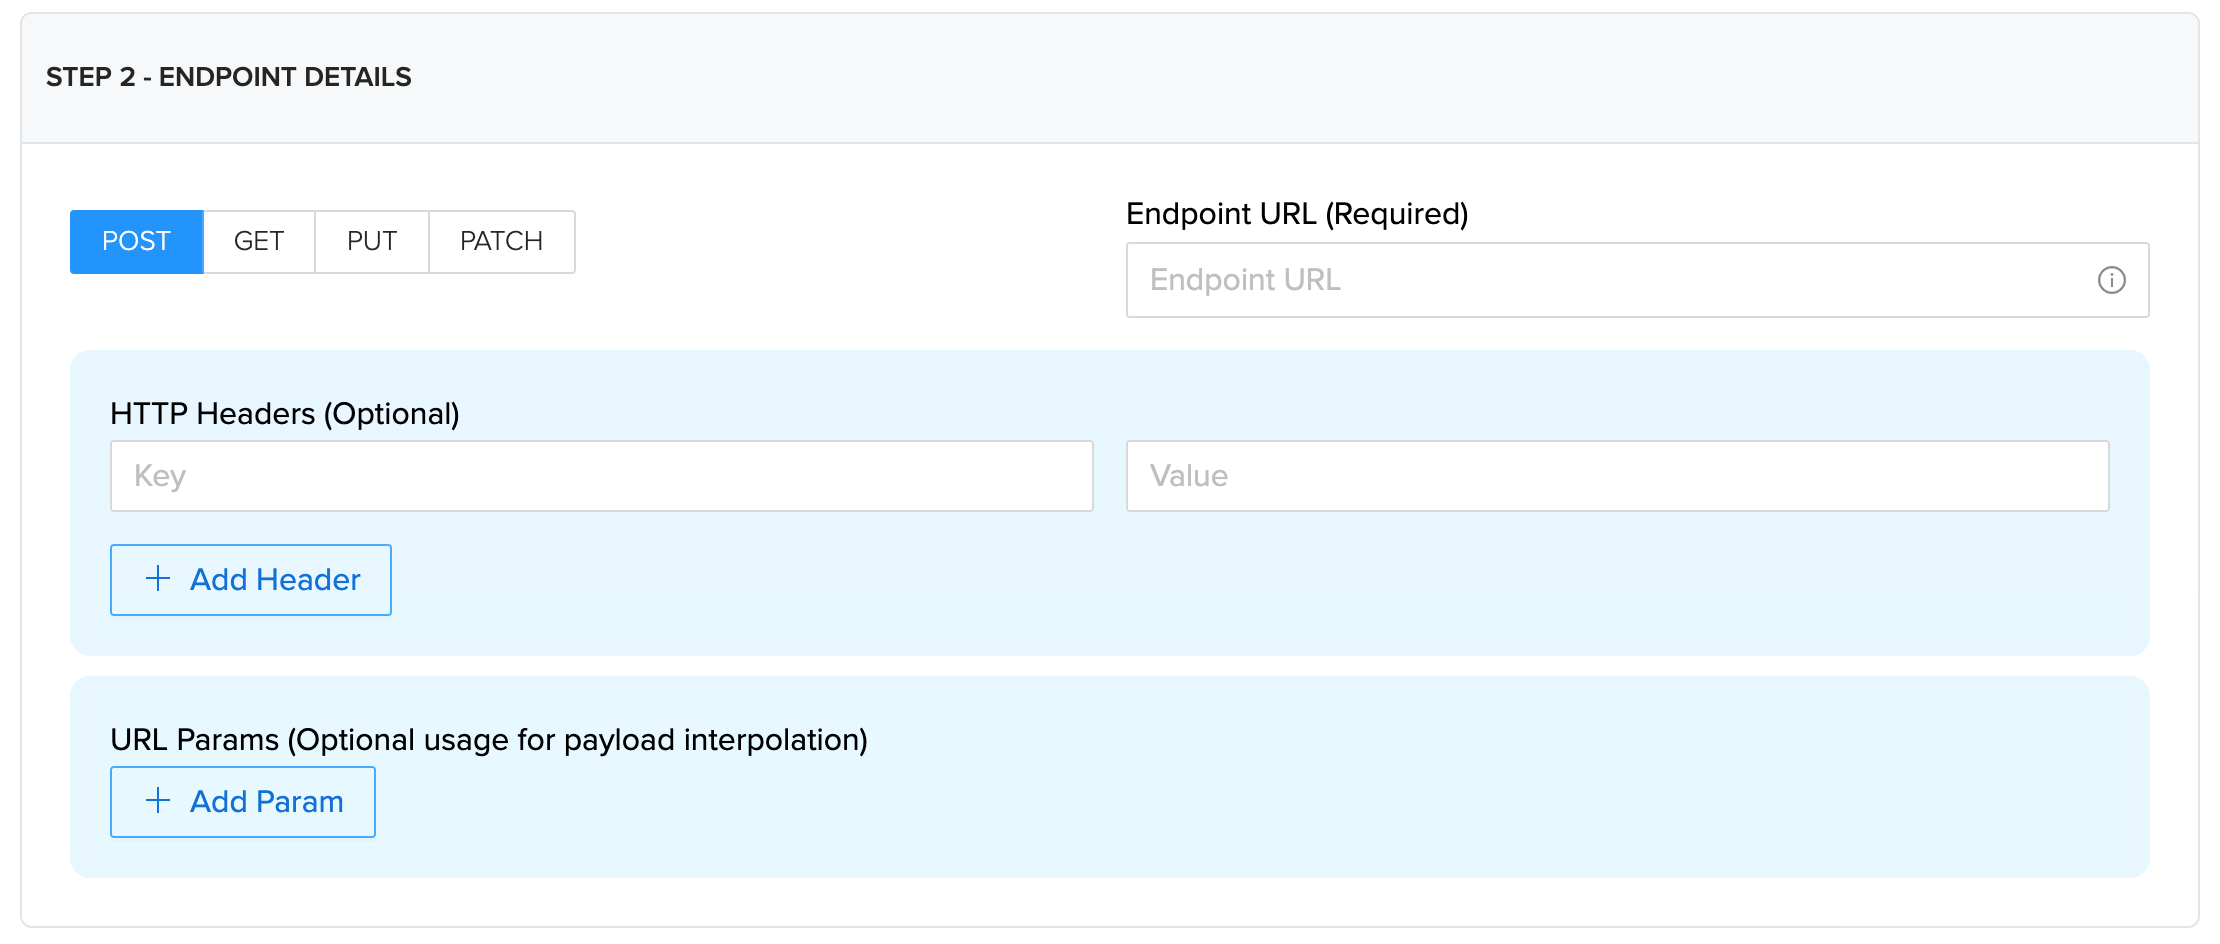
HTTP Header and Value are not required and those can be left blank.
Lastly, provide a name for the integration. Names do not have to be unique.
Click Add Integration.
Your new integration is now ready for use! Please read about the JSON schema to understand how to parse data received.
Integration Details
View the details of your integration by clicking on the Integration name.
Integration Details shows the integration ID that is unique to each integration, the name, the type of integration, and whether it is active or not.
HTTP Details shows the specific endpoint which can be changed.
Devices Piped lists all the devices that are currently sending their data to the selected integration.
Update your Connection Details allows you to update your HTTP connection details for the currently viewed integration.
Downlink (Send Data to Device)
Downlink refers to the network sending data down to be received by your device. With regards to the
HTTP integration, this will be data sent to a unique URL called the downlink_url provided by
Console.
Downlink URL Format
https://console.helium.com/api/v1/down/{Integration_ID}/{Downlink_Key}/{:optional_device_id}
You can send downlinks to every device that your HTTP integration is attached to or just a single
device by including the device UUID at the end. You can find this downlink_url with the required
downlink key in it on the HTTP integration page in the details section, an example is shown below.
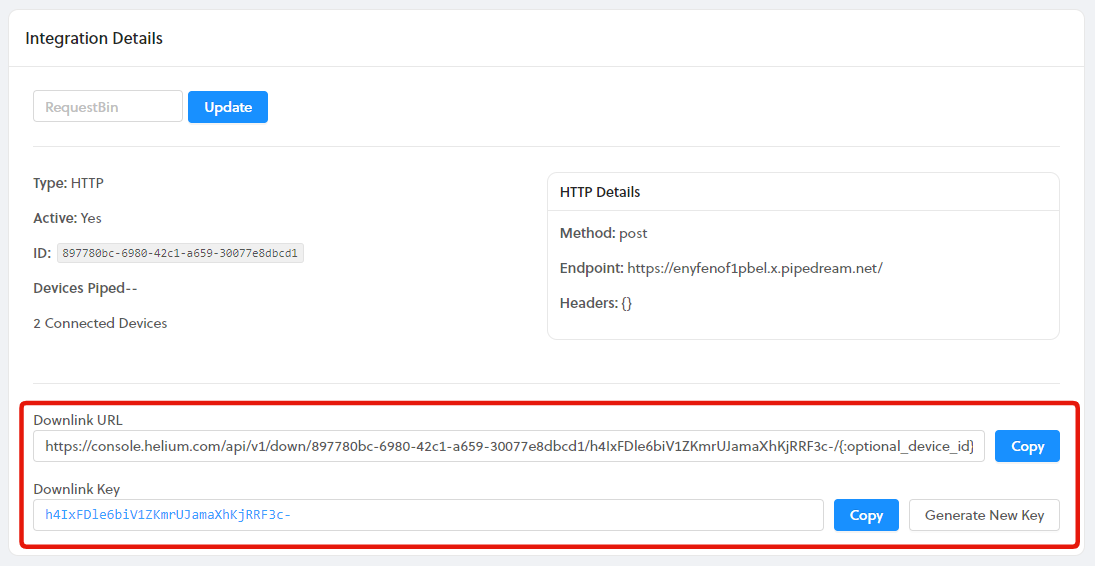
The downlink URL can also be found in the uplink JSON message for that particular device. It will look similar to the URL shown below. You can also find it using the Debug window on your device page.
Downlink URL Example (Sends to all Devices with Integration Attached)
"downlink_url": "https://console.helium.com/api/v1/down/897780bc-6980-42c1-a659-30077e8dbcd1/h4IxFDle6biV1ZKmrUJamaXhKjRRF3c-"
Downlink URL Example (Device Specific)
"downlink_url": "https://console.helium.com/api/v1/down/897780bc-6980-42c1-a659-30077e8dbcd1/h4IxFDle6biV1ZKmrUJamaXhKjRRF3c-/d2c7b8dc-221a-4ec8-aedd-6c19ae348a33"
To send the downlink message, make a POST request including a JSON body with the following fields shown below, see more details on the fields here.
Downlink JSON Message Example
{
    "payload_raw": "SGVsbG8sIHdvcmxkIQ==",
    "port": 1,
    "confirmed": false
}
Downlink Tool Example
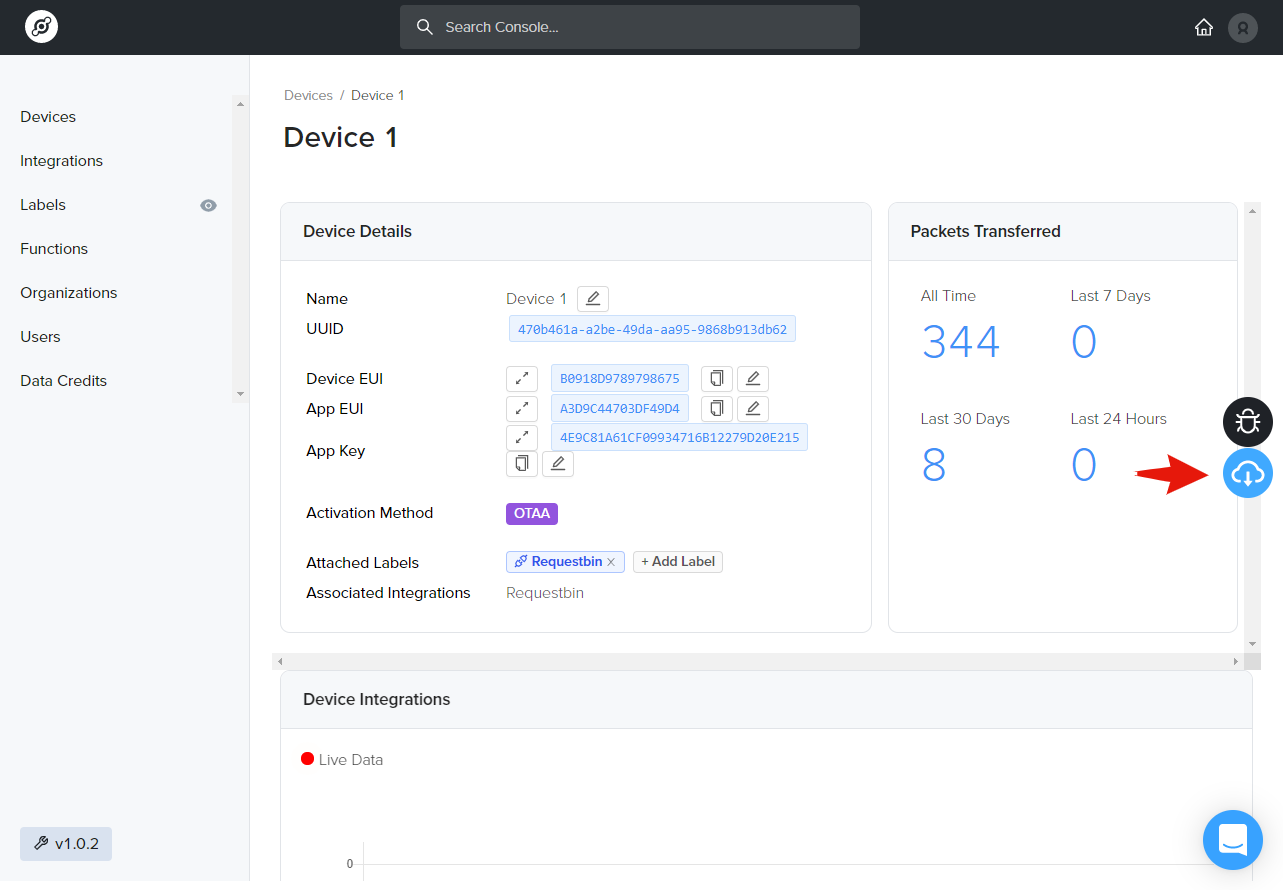
The easiest way to send a downlink to your device is to use the built-in downlink tool in Console. You will find it on the right side of every device page, as shown below. In order to use the downlink tool, you must have an HTTP integration attached to the device.
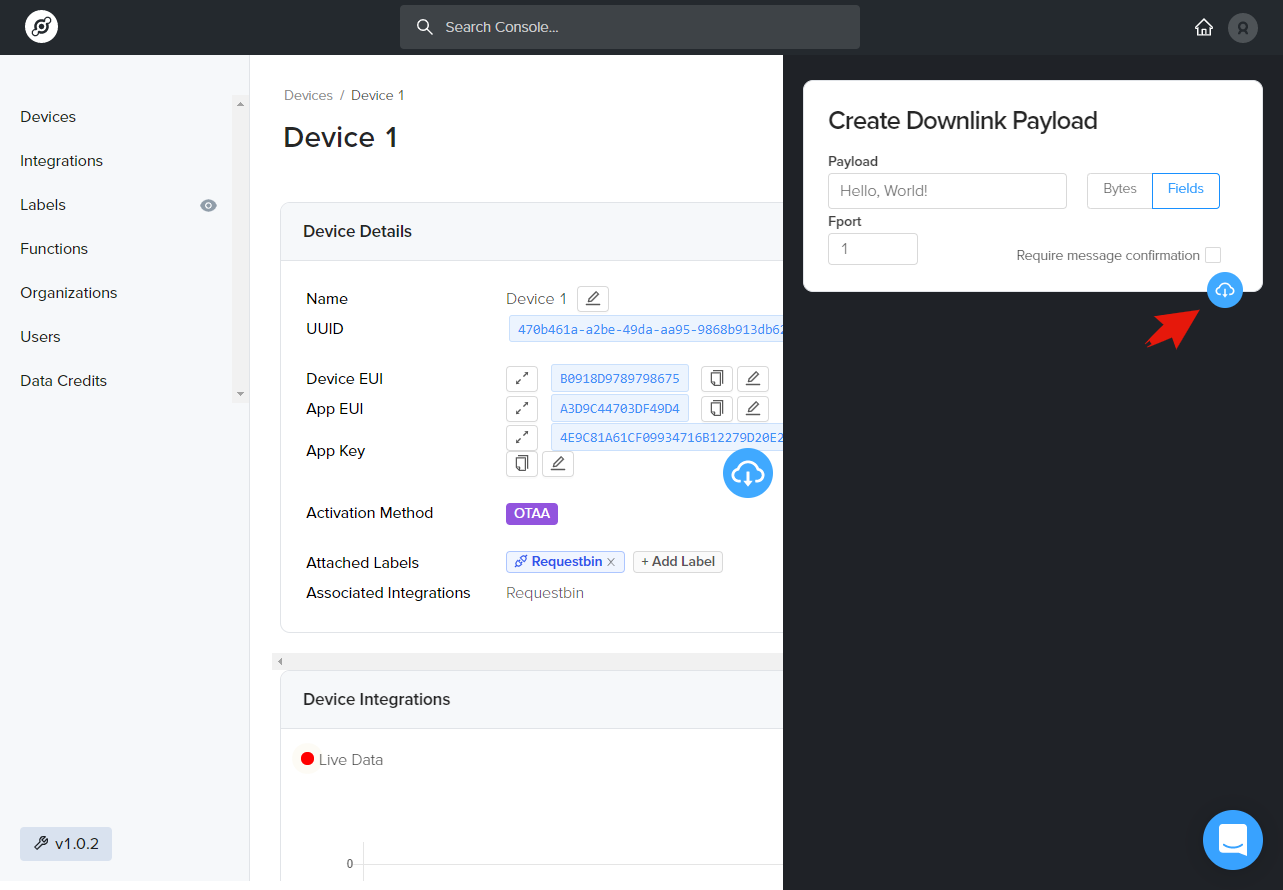
Once you have the downlink tool open, you can input the downlink payload string in the payload field. Select Encoded if you are inputting a string that is already Base64 encoded, and Plain if it is plain text. Last, select your Fport, whether or not you want to send a confirmed downlink, and click the downlink send button as shown below.
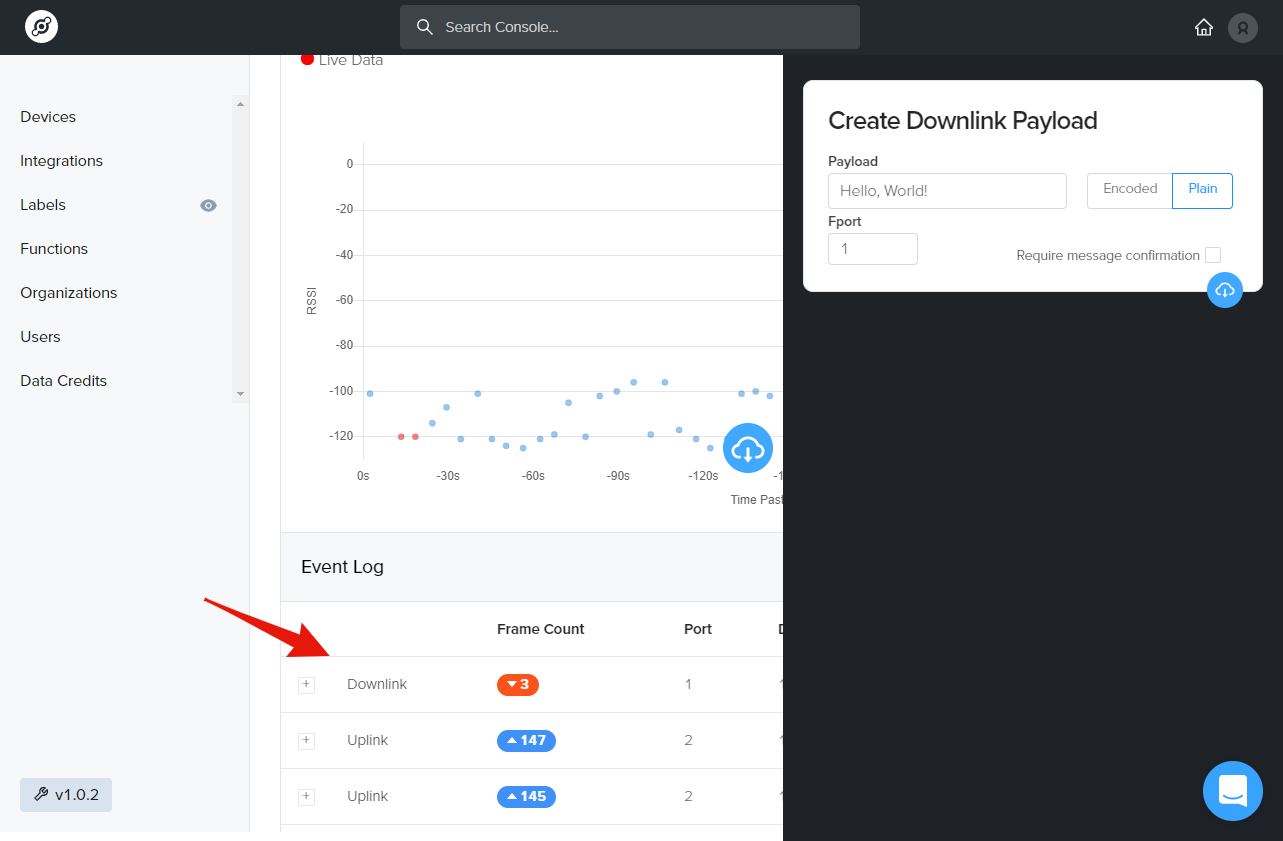
Once you have initiated the downlink, you should see the downlink event show in the event log, as shown below.
Postman Example
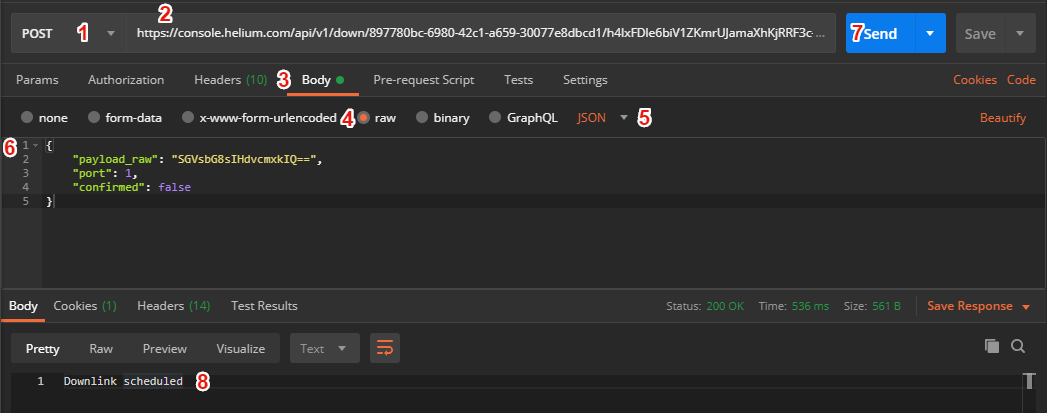
Postman is a popular developer utility for HTTP based services, you can download it here. We can use this utility to easily make a POST request to the downlink URL with our downlink JSON message. Follow the steps below to successfully send your downlink message to your device.
- Select the type of HTTP request, POST in this case.
- Enter the downlink URL here.
- Select Body to begin entering your message details.
- Select
rawas your body type. - Select
JSONas the body format. - Enter your JSON message with the required fields.
- Finally press
Sendto transmit the message. - You should see a response of
Downlink scheduledif successful.
Connecting Integrations to Devices
Devices or groups of devices (via labels) can be directly connected to integrations on the Flows Worskpace. Labels are identifiers used to group devices for easy management. To connect one or more devices to one or more integrations, simply connect the Device and Integration nodes on the Flows Workspace.
info
Quick video tutorial connecting devices to an integration here.
Node elements (devices, labels, integrations) need to be created before they're available on the Flows Workspace. More information about Flows here.
Advanced - JSON Message Template
important
This is an optional, advanced feature and should only be used by users familiar with logic-less templates.
Users can customize the JSON Message structure sent to Integrations. Includes the ability to write custom JSON Messages and use supplied predefined JSON templates for Cayenne, and Browan.
Decoding base64 payloads
Users can send decoded base64 payloads (to hex or bytes) from device to desired integration without creating a decoder function for brevity.
To decode the base64 payload simply use base64_to_hex() or base64_to_bytes() in your integration JSON like the following (other keys are optional):
{
  "payload": "{{base64_to_hex(payload)}}",
  "name": "{{name}}",
  "app_eui": "{{app_eui}}",
  "dev_eui": "{{dev_eui}}",
  "devaddr": "{{devaddr}}",
  "fcnt": "{{fcnt}}",
  "port": "{{port}}",
}
{
  "payload": "{{base64_to_bytes(payload)}}",
  "name": "{{name}}",
  "app_eui": "{{app_eui}}",
  "dev_eui": "{{dev_eui}}",
  "devaddr": "{{devaddr}}",
  "fcnt": "{{fcnt}}",
  "port": "{{port}}",
}